If my name looks familiar to many of you Mirrix aficionados out there, it should. It is hard to believe but it was exactly a full year ago that I began blogging for Mirrix. In fact, it was the end of July 2012 that I learned that I had won the contest that Mirrix sponsored to find a new blogger for Claudia’s Craftsy class. Well, I can surely tell you that a lot has happened during the course of the last year and unfortunately for me, much of it has taken me away from weaving and my Mirrix loom. However on a rare occasion that I was able to catch up with the Mirrix happenings, I caught sight of a really compelling bracelet that Claudia had designed. It didn’t have a name nor any real details other than that a special weave-along class and kit* was to follow. I went on about my business storing this information away for a later date when life returned to normal.

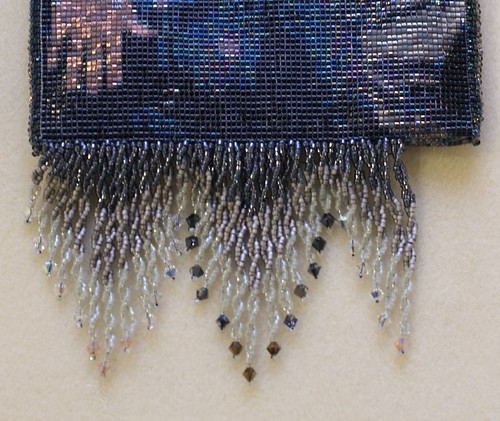
Months later, while life hadn't exactly returned to normal, I still had not forgotten about this mesmerizing bracelet. I had never seen anything like it before and although I had some idea as to how it might be constructed, I wasn’t sure I could copy it myself without some guidance. My spontaneous suggestion to Elena to commence blogging again was met enthusiastically, and here I am. If you too have been smitten with this mystery bracelet, then follow along with me as I take you through its construction, step-by-step. I will provide instruction in three parts. The first will detail bead weaving the bracelet’s base; the second will include the fun part- or the embellishment; and the third part describes the finishing touches in turning your beaded piece of art into an actual bracelet to be worn on your wrist.

Warping
The warping is standard using ten warps of the C-Lon beading cord. No shedding device is necessary. The weaving of this bracelet has two distinct phases. The first phase is quite basic where you will create a grid-like base using your choice between the 8/0 seed beads, 10/0 delica beads and an occasional 6/0 bead which are all included in the bead soup that comes with the kit.
Next: Bead Weaving the Base
*Weave-along Class dates: March 10-24, April 7-21, May 3-24 2013
Next: Bead Weaving the Base
*Weave-along Class dates: March 10-24, April 7-21, May 3-24 2013
Kit includes enough to make TWO bracelets: 60 grams Bead soup, black C-Lon cord & black C-Lon beading thread, black ultra-suede, 2 pewter buttons, written instructions

")
")
")
")
")