Showing posts with label Social Market for a Mirrix: Noreen. Show all posts

Saturday, September 29, 2012

Cheerio and tootle pip!

Four hectic and busy months have passed since I  signed on for the 'Social Networking' summer 2012 campaign, and now my time here ends.

Hmmmm.... wrapping up..... well.... I've been mulling over what I would say to sum up my 4 month long adventure exploring the possibilities  of the Mirrix looms.


I've made 25 video tutorials, and posted 35 blog posts about the things I have discovered while working with my Mirrix looms.

I've figured out some new ways of working with the looms ( 's' hooks for the no warp ends techniques) and enjoyed trying out as many ways as I could think of to use the looms in innovative and creative ways.

One of the loveliest things has been connecting with other Mirrix aficionados and making friends with dear people.

So, even though I won't be posting here or on Elena's blog anymore (where all the Weave Along posts are), I will continue to share my love of weaving and my pleasure in using Mirrix looms on my blog: www.tottietalkscrafts.com

Cheerio my friends, tootle pip, and fare thee well! 
Happy weaving, go gently, and be well!

Wednesday, September 26, 2012

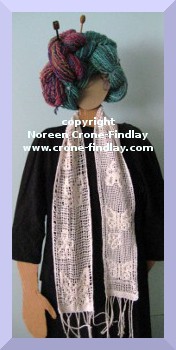
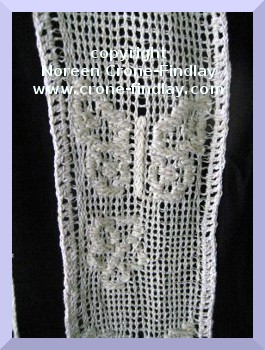
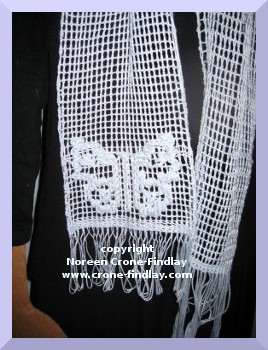
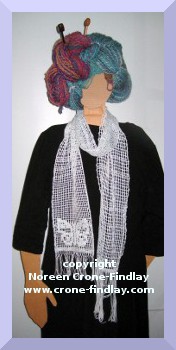
Embroidering Leno Lace

I am passionate about lace and lace making. 
I love to tat, crochet and knit lace.
And, recently, I have been experimenting with weaving lace.
Well... weaving leno lace and then embroidering it.....
copyright Noreen Crone-Findlay
This was my first attempt, and to be honest,  it's wonky and woobley and 'real weavers' would consider it to be a messy failure.

copyright Noreen Crone-Findlay
But, I really learned a lot while I was working on it- and am intrigued and intend to keep working with this technique.
By the way, this was woven on my 16 inch Mirrix loom, with loom extenders attached.
When I was warping up for my second embroidered Leno lace scarf, I made  a video about the things I figured out while  warping with loom extenders:


I got so overwhelmed with all the work for the Soumak Weave Along that I didn't have time to do much more with the embroidered leno lace. 
I needed my 16 inch loom for a tapestry, so I wove off the blue scarf to get it off the loom, and will be doing the embroidery with the scarf being off loom.
copyright Noreen Crone-Findlay
I am pleased with the progress I have made with the embroidery, and look forward to doing more of this technique.
I love scarves and wear them year round. 
Leno lace scarves are light enough to be comfortable even in the summer, especially in the evening.
copyright Noreen Crone-Findlay
I haven't had a chance to wash and block this one yet, so it's not as nice as it will be.
I am planning on working a twisted cord with beads on it for the fringes.  
Leno lace is so wonderful and has so much design potential that I intend to continue experimenting with it!
Happy Weaving!
:o) Noreen

Saturday, September 8, 2012

Travels with Mini

When a weaver and a musician go on holidays, what do they take with them?
copyright Noreen Crone-Findlay
Their dogs, of course!
But of course, they never leave home without a guitar
copyright Noreen Crone-Findlay
Or, a loom:
copyright Noreen Crone-Findlay
 
The Mini is the most perfect little loom for traveling.
Because she's so portable, I was able to keep working on the Weave Along #8 as we were out and about on our travels.

I was weaving away on this pouch while we were away:
copyright Noreen Crone-Findlay
So, I took advantage of the gorgeous scenery to photograph the step by step photos of weaving the pouch:
copyright Noreen Crone-Findlay
Mini has her own wee suitcase which she snuggles very happily into, along with all the bits and pieces needed for the weaving.
(It began life as a case for a drill that lives in a toolbox, so Jim gave the un-used case to me and I love it for  Ms Mini!)

When we are on holidays, I tend to photograph the smaller things, like lichens:
copyright Noreen Crone-Findlay
and flowers (ahem... the wind was crazy, so trying to get the flower to sit still was a lost cause)

copyright Noreen Crone-Findlay
and small looms on beautiful stony beaches:
copyright Noreen Crone-Findlay
and the patterns in tree roots:
copyright Noreen Crone-Findlay
and shadows:
copyright Noreen Crone-Findlay
and gorgeous driftwood:
copyright Noreen Crone-Findlay
and the patterns in nature:
copyright Noreen Crone-Findlay
and small dogs having great adventures ... (Yikes! Wolves ATE a dog here? eegads!)
copyright Noreen Crone-Findlay
Speaking of wild animals, last year when we went to Jasper (in the Rocky Mountains of Alberta, Canada), we saw 13 bears!
This year, we only saw one:

copyright Noreen Crone-Findlay
But we did see one VERY thrilling wild animal- the first time I have ever seen a wild mountain goat, in fact:
copyright Noreen Crone-Findlay
It was rainy, windy and cold for the entire time we were there, which made perfect weather for weaving and making music :o)

But then, as far as I am concerned, ANY weather is perfect for weaving and making music :o)

 I will be posting the step by step photos for the checkered Soumak Pouch on the 19th of September.

And, of course, the installments of the  Soumak Pouch weave along will continue to be posted on Elena's blog, A Word From Elena,  every Sunday and Wednesday through out September.

I hope that you had a lovely summer and that the sun shone upon you, and music swirled around you and that the yarn was sweet in your hands! 
~Noreen~


Saturday, August 25, 2012

Two more pouches for the Soumak Pouch Weave Along

I've been shooting videos for the weave along  that begins on September 2nd.
As I was shooting, I was weaving along on a couple of pouches.

Here they are:

A Stripey one, with some beads and other embellishments:
copyright Noreen Crone-Findlay
and the back:
copyright Noreen Crone-Findlay
I wove it with Lion Brand Bonbon yarn- cotton for the body of the pouch and metallic for the embellishment.

The size 8 beads along the sides are from Mirrix and the bone beads at the lower edge were in my stash.


The medallion on the back of the pouch is one that I snitched from a box of stuff that my daughter in law was going to give away. 
(She gave it away, but to ~me~ instead of giving it to 'anonymous' -  I can be shameless when it comes to pretty goodies! )

My daughter in law grinned at me when she saw the finished pouch, and said:
 'This one is yours, isn't it, Mum?'
'Yes! but how did you guess?'
She just laughed.
  I guess it's because I adore these colors and use them all the time!
...
I was concerned about this pouch:
copyright  Noreen Crone-Findlay
Why?  Well, because both my daughter and my daughter in law declared that they loved it and would love to have SantaMamma leave it in their Christmas stocking.

I didn't want to make two pouches that were exactly alike, so I had to have a big old think about it.

And, I came up with the perfect answer!!!!!
copyright Noreen Crone-Findlay
TADAH!!!!   I wove it up in the same colorway, but using the drop dead luscious wool yarn from the Mirrix kit   [LINK to purchase]
(and, please note,: I don't profit by raving about the delicious and gorgeous yarns I am using for these pouches, but I am just tickled pink with them, and VERY happy to say: WHEEEEEEEEEEE about them and to say: Yup... thumbs up, order and love 'em, too)   :o)

Here's the back of the woolie pouch:

www.kreinik.com supplied me with the gorgeous embroidery thread and edging cord for this pouch.
Here are the links for them:
The edging is 3/8 " trim:  # 170 Natural Pewter    
http://www.kreinik.com/kshop/product.php?productid=17023&cat=0&page=1

The embroidery thread is: Ombre: http://www.kreinik.com/kshop/product.php?productid=622&cat=0&page=1  1000 - Solid Silver
I love the combination of the soft loftiness of the wool with the sparkle of the metallic embroidery floss. The embroidery thread is soft and lovely to work with. Some metallics can be barky and sharky. This is soft and nooshy.

!AND! 

Happy dance!
and   ~whew~

My daughter in law (who happens to be an incredibly gifted and talented handspinner, so she is naturally inclined to be more drawn to wool),  likes the woolie pouch -

HURRAH! SantaMamma is so relieved! 

My girls will have their lovely pouches in their Christmas stockings, and they are 'sister pouches'.... similar, but each unique!  
Alright... time for me to get back to editing video.....  :o)
~Noreen~

Friday, August 24, 2012

Furoshiki wrap technique to carry a small loom

Furoshiki wrap technique to carry a small loom


I rarely leave home without a small loom.
If I am the passenger in a car, I  weave.
If I have to wait for an appointment, I weave.
When in an airport or flying.... I weave.
If I am sitting, listening to my husband's Jazz trio/quartette/quintette, I weave.
I like to be able to to port along my small looms in  tote bags, backpacks or baskets.
But.... the warp strands and bobbins and needles can get seriously disarranged by being jostled in transit.
I have been mulling over the best way of protecting them while they are being trundled about.... and then it struck me....

By using the Japanese technique of creating perfect wraps and carriers from a scarf or cloth! :
FUROSHIKI  (link to a ton of ways of doing furoshiki wraps)
3 Mirrix looms wrapped with Furoshiki techniques
copyright Noreen Crone-Findlay
I always carry headscarves in my purse or bag, to use as instant tote bags.
The other day, it struck me that the perfect way to protect my beloved small looms when I am slipping them into bags or baskets for their travels, is to 'Furoshiki' them.
It works BRILLIANTLY!
I usually use square headscarves- and any size will work... smaller scarves are great for small looms or bundles of books and tools; larger scarves for larger bundles of looms and stuff.
But, you don't have to use scarves: This is a great upcycling opportunity!
You can use squares of fabric cut from old shirts or skirts or dresses :)
You can also use cloth squares to gift wrap presies. Do check that link at the top of the page. Impressive :)
Here's a video, showing how to use Furoshiki wrapping techniques to make an instant, customized carrier for your small loom:
The models in the video are my 3 smallest Mirrix looms.  I call them the Three Sisters.
I love, love LOVE my Three Little Sisters!  I have renamed them: The Mini is 'Molly Whuppie' (you can read her story in my book, Soul Mate Dolls), 'Vasilisa' (heroine of a wonderful Russian fairytale) is the name of the 8 inch loom, and the 12 inch is now known as 'Jane', after my beloved Jane Austen.
I do believe they quite like their travel wraps! :)
Here's the video that I made to show how I wrap my looms :
 :o) Noreen

Sunday, August 19, 2012

Oooh Claudia made gorgeous kits for the Soumak Pouches

Oooh, Claudia has made gorgeous kits for the Soumak Pouches!


Oh my word!
Claudia has outdone herself in making the kits for the Soumak pouches for the Weave Along in September:
copyright Noreen Crone-Findlay
Aren't the  colors and textures gorgeous?
I just went and picked up the text from this page: LINK
If you're a weave-along 8 participant get $10.oo off this kit with discount code:   weavealong8
This package goes with our Weave-Along 8 hosted by Noreen Crone-Findlay.

Learn more about the weave-along and sign-up here today.
Kit Includes:
-30 yards of 10 each of ten colors of  wool/mohair yarn
-12 x 6 piece of silk for lining
-A semi precious stone for a clasp
-100 gram tube of Navajo Wool Warp
*Please note, this kit does not come with fiber for the edging or a kumihimo kit to make one.
The kit can be purchased separately.
You will have 4 options for making the edging cord for the pouches: 
1- A beaded peyote stitch tubular cord.  If you want to make your cord with beads, be sure to add beads to your shopping list.  Either #8 or #11 work fine, depending on what your favorite size is. I used the #11.
You can order them from Claudia when you order the kumihimo kit and the pouch kit. 
By the way, you will be able to weave more than one pouch from the kit.
OR:
2- A kumihimo cord. You can order it from the link above.
OR:
3- A spool knitted cord.  LINK for the ordering information.
OR:
4- A twisted cord. I'll be showing you how to make a twisted cord with a spool and a crochet hook.
I am rubbing my hands together in delight, as I am having a wonderful time working on a ton of videos to make the Weave Along really fun and super user friendly.
There is a mountain of information, so I am breaking it all down into bites that make sense and are easy to refer to when questions come up.

Happy Weaving!
Noreen


Monday, August 13, 2012

Chalkboards are low tech dandy design tools

Chalkboards are low tech dandy design tools


Sometimes, I get stuck in the design process.
That’s when I need to give myself nudges that break up the mental and emotional constriction that is keeping me from moving forward in a project.
And, so, I reach for some of my favorite tools that help me to see things differently.
My chalkboards and chalk.

copyright Noreen Crone-Findlay
Eh? as we say in Canada :)
Really!  A chalkboard is a fabulous tool for knocking the design blechs sideways!
I have wondered about why they work so well for me and I think that there are a couple of reasons.
The first is that white chalk on a black surface reverses the way I normally see things when I am drawing.
This is invaluable, because it clears the deck of any pre-conceived notions that I had about sketching.
It’s like working with negatives instead of photographs. You really do see things differently.
And, if you are stuck, then that is really helpful!
The second reason why I love chalkboards so much is that drawing on a chalkboard is so playful.
There’s a real feeling of ‘little kid’-ness to them that is definitely very freeing.
You know that it’s not permanent… it’s just a bit of dust on black paint … so wheee…… draw, draw, draw!
If you don’t like it…. whoosh whoosh, wipe it off and it’s gone.
If only the rest of life were so easy!
AND… if you do like it, then grab a piece of paper and a pencil and copy the sketch onto the somewhat more permanent surface.
How did I get such a neat shape chalkboard?
Easy.
I drew the shape on masonite, cut it out and painted it with several coats of chalkboard paint from the hardware store.
I even like the scritchy sound the chalk makes when I am drawing.
Low tech is often a wonderful way of opening the doorways to creativity and imagination.
Try it…. you might like it :D
Happy sketching and chalky drawing!
Noreen
PS: Anne, who is one of my online friends in the Mirrix facebook group suggested that you take pics of your favorite sketches and load them into your paint or bead making programs.  I don't use those programs, so it didn't occur to me. 
Anne's suggestion also reminded me that I do take 'archival' photos of some of the sketches that I really like... sorry... I completely forgot to mention that!  Thanks for the reminder, Anne! :)

Tuesday, August 7, 2012

Mirrix Loom Weave Along Soumak Pouch- 2- Looms, tools, equipment

Mirrix Loom Weave Along # 8 -Soumak Pouch- 2- Looms, tools, equipment


This is the second 'Prelude Post' for the Mirrix Loom Weave Along for the Soumak Pouch.
The pouches are perfect for both business cards:
copyright Noreen Crone-Findlay
or for cellphones:
My cellphone is one of the smaller, lower tech ones  [4inches tall, 2 inches wide, 5/8 inch thick] if yours is larger, then you will want to upsize your pouch, if your pouch is going to be a cellphone pouch.
copyright Noreen Crone-Findlay
Alright... now onto the gathering up of tools and equipment:
First of all, you need a loom:
copyright Noreen Crone-Findlay
Most of the photos and videos for the weave along will feature my 8 inch Lani Mirrix loom. (Although I have ordered a Mini and a Little Guy, so hopefully, they will arrive soon, so I can use them in the photos and videos, too.)
The pouch can also be woven on any of the larger Mirrix looms as well- if you are using one of the smaller Mirrix looms, then warp up one pouch at a time. If you are using one of the larger looms, then you can warp and weave 2 pouches at the same time.
Even if you don't have a Mirrix loom, please feel welcome to join in the Weave Along.
As long as you have a loom that you can get good tight tension on it, then you will be able to weave the pouches.
copyright Noreen Crone-Findlay
You will also need: A steam iron, a pressing cloth, a good source of light, pencil crayons or watercolors or some other way of coloring your preliminary pattern colorways, 2 clothespins, scissors, needle and thread for finishing, snap fastener and a swivel clip, you'll also need paper for tracing out your patterns and trying out different color schemes.
copyright Noreen Crone-Findlay
Knitting needles and crochet hooks are very helpful, and  a loop turning tool is  handy (I bought mine at my local fabric store),  a piece of cardboard that is 10 inches tall by 3 inches wide (25 cm tall by 7.5 cm wide),  a weaving stick, small paper clamps, a fork or beater, a hole punch, at least a yard of firm yarn or cord, clear tape (packing tape works well); a black fine tip permanent marker
copyright Noreen Crone-Findlay
You'll need rods for the top and lower edge of the weaving: 6 inch (15 cm) tent pegs or 6 inch (15 cm) lengths of steel or brass rods 1/8 inch in diameter (I bought a 36 inch long one at the hardware store and cut it to 6 inch lengths with a hacksaw);  velcro straps (I bought mine from Lee Valley:  Link'S' HOOKS: 25  "S" hooks, either 7/8 inch or 1 inch- opened or closed :[ I had a huge 'AHA' when I bought closed 'S' hooks.... having one end closed is just GREAT... so if you buy closed 'S' hooks, open one end with pliers.  If you buy open 'S' hooks, squeeze one of the ends closed. Having the closed end keeps the 'S' hooks on the rod.  :) ] ; 1/4 inch Washers: 54 in total; 1 or 2 pairs of pliers for adjusting the 'S' hooks; ruler and tape measure.
copyright Noreen Crone-Findlay
Some of these things have shown up in other photos, so I won't list them again, but the other things are:  A small bowl for holding pins, needles, clamps etc;  a bag or box to store and transport the project (that's Tottie Tomato's knitting bag); chopsticks are very handy for several things  besides your Pad Thai :)
copyright Noreen Crone-Findlay
You will need at least 5 or 6 blunt tapestry or craft or darning needles. It's handy to have a needlebook or tin, or cardboard tube or eyeglass case to store them in.
copyright Noreen Crone-Findlay
To line the pouch: Fabric (I upcycled one of my son's abandoned t shirts for the lining of the first 4 bags), scissors, pins, needle and thread, snap fastener: I used the 15 mm size.
copyright Noreen Crone-Findlay
To make the edging cord: A kumihimo kit (the cd is a stand in as I haven't received mine yet) available from Mirrix: LINK
OR a spool knitter: Lion Brand: LINK
or Harrisville:  LINK

CHECKLIST at a glance:

- Loom

- steam iron
- pressing cloth
-a good source of light
- pencil crayons or watercolors or some other way of coloring your preliminary pattern colorways
- paper for tracing out your patterns and trying out different color schemes
- 2 clothespins
-scissors
-needle and thread for finishing
-snap fastener 15 mm size

-swivel snap hook (optional)
-knitting needles & crochet hooks
-Optional:  a loop turning tool is  handy
-a piece of cardboard that is 10 inches tall by 3 inches wide (25 cm tall by 7.5 cm wide)
-  a weaving stick
- small paper clamps
-a fork or beater
-a hole punch
-at least a yard of firm yarn or cord
-clear tape (packing tape works well)
-a black fine tip permanent marker
-Rods for the top and lower edge of the weaving: 6 inch (15 cm) tent pegs or 6 inch (15 cm) lengths of steel or brass rods 1/8 inch in diameter
-velcro straps   Link
-'S' HOOKS: 25  "S" hooks, either 7/8 inch or 1 inch- opened or closed 
1/4 inch Washers: 54 in total
-1 or 2 pairs of pliers for adjusting the 'S' hooks
-ruler and tape measure
- small bowl for holding pins, needles, clamps etc
- a bag or box to store and transport the project
- chopstick (optional)

- At least 5 or 6 blunt tapestry or craft or darning needles and a needlebook or tin, or cardboard tube or eyeglass case to store them in.
-Lining fabric
- Straight pins

-kumihimo kit  OR a spool knitter
-any other embellishments, beads, buttons, charms or found objects that you wish to use.
Happy Weaving!
:) Noreen

Friday, August 3, 2012

Mirrix Loom Weave Along #8- Soumak Pouch-1-Warp and Weft

Mirrix Loom Weave Along  # 8 -

Soumak Pouch- 1- Warp and Weft


In September, I will be leading a Weave Along, using Mirrix Looms.
I will be posting the  pattern, video tutorials, instructions and step by step photos for the Weave Along here on Tottie Talks Crafts.
copyright Noreen Crone-Findlay
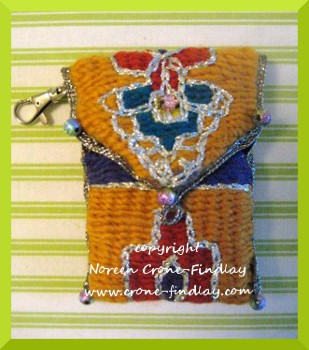
The project is a Business Card Pouch, which also works well as a cellphone pouch, woven in Soumak, embellished with corded edges and chain stitch embroidery.
I have designed it to be welcoming to entry level weavers, but also, with options that will appeal (I hope) to more advanced weavers, too.
Because it can take awhile to get orders cleared and shipped, I am posting some suggested warp and weft yarns, as well as the links for ordering them now.
Hopefully, your yarns will arrive before September first.
Here are a few photos of some of the Business Card pouches that I have woven so far:
copyright Noreen Crone-Findlay
This is the first Business card pouch that I wove, using:

copyright Noreen Crone-Findlay
Harrisville Warp LINK
and: Wool weft:  Harrisville Variety Yarn Pack: Brights LINK
copyright Noreen Crone-Findlay
I wove the second  pouch with the Harrisville warp and for weft:
copyright Noreen Crone-Findlay
Harrisville Variety Yarn Pack Jewels LINK
copyright Noreen Crone-Findlay
I quite like both p0uches, but .... OOPS!
They are slightly too small for their intended purpose!  EEGADS! Business cards don't fit in them!
copyright Noreen Crone-Findlay
So, I went back to the drawing board, and altered the pattern.
By then, gorgeous yarn had arrived from Lion Brand yarns: LINK TO BONBON YARN
copyright Noreen Crone-Findlay
The photo doesn't convey the scale of the balls of Bonbon...
They are tiny, perfect little balls of loveliness. Each of them is 2 1/2 inches (6cm) tall.
The cotton is simply gorgeous to weave with.  I love it.
I wove these Pouches in Bonbon cottons, with Metallic chain stitch embroidery:
copyright Noreen Crone-Findlay
I used the  'Nature' colorway for the pouch in the photo above, and 'Beach for the pouch in the photo below:
copyright Noreen Crone-Findlay
The Metallic yarns come in six packs, as does the cotton. I used yarns from both colorways: Party and Celebrate, for these pouches.
copyright Noreen Crone-Findlay
My daughter in law suggested that I add a swivel snap hook to the upper corner of the pouch.
I thought that it was a great suggestion, and so I have added it.
The swivel clip allows you to clip it to your bag, or the belt loop of blue jeans.
If your cellphone is one of the larger ones, you may need to upsize your pouch if you would rather use it as a cellphone pouch instead of a business card pouch.
copyright Noreen Crone-Findlay
I used Lion Cotton for the warp for these two pouches, because I wanted to use yarns that you can order at the same time to make this all easier for you:
copyright Noreen Crone-Findlay
I wasn't sure if it would work for the projects, but it does just fine.
I don't think that I would use it for tapestry warp for a really large project, because it has a cheerful slightly bouncy nature.
Warp for tapestry really does need to be made of sterner stuff :D  None of that youthful springiness!
Speaking of warp- a couple of my Ravelry friends have asked if carpet warp would be okay for the Weave Along, and yes, indeed, it will work fine.
copyright Noreen Crone-Findlay
I am going to weave some of the pouches on carpet warp, and also on the green linen that's on that ginormous spool.
I am waiting for yarn (both Warp and Weft) from Mirrix. When they arrive, I will edit them into this post.
They haven't arrived yet, but Elena has posted a photo and a link for the kit:

Gorgeous, yes?  :D
Here's the link to order them:  MIRRIX KIT LINK
In my next post, I will show you the equipment, materials and tools that you will need to gather up for the Weave Along.
Here's the link to  a post that has all the blog post links, to keep everything quick and easy to refer to : LINK
You are invited to post comments on the blog posts here on Tottie Talks Crafts.... AND....
Please post your photos and join in the discussion on the Facebook group: LINK
And, you can post your weave along photos and chat with the other WAL participants on Ravelry, too: LINK
There's a sign up on the Mirrix website so you'll get notifications of the posts. LINK

CHECK LIST FOR WARP AND WEFT:
- warp
-weft
-optional contrast yarn for chain stitch embellishment

You are so welcome to join in!
:) Noreen