Showing posts with label handwoven. Show all posts

Tuesday, August 7, 2012

Mirrix Loom Weave Along Soumak Pouch- 2- Looms, tools, equipment

Mirrix Loom Weave Along # 8 -Soumak Pouch- 2- Looms, tools, equipment


This is the second 'Prelude Post' for the Mirrix Loom Weave Along for the Soumak Pouch.
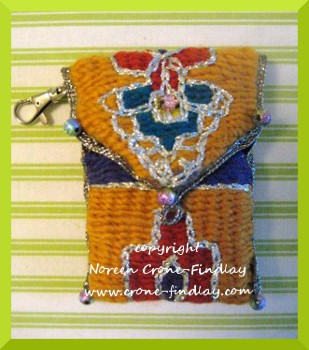
The pouches are perfect for both business cards:
copyright Noreen Crone-Findlay
or for cellphones:
My cellphone is one of the smaller, lower tech ones  [4inches tall, 2 inches wide, 5/8 inch thick] if yours is larger, then you will want to upsize your pouch, if your pouch is going to be a cellphone pouch.
copyright Noreen Crone-Findlay
Alright... now onto the gathering up of tools and equipment:
First of all, you need a loom:
copyright Noreen Crone-Findlay
Most of the photos and videos for the weave along will feature my 8 inch Lani Mirrix loom. (Although I have ordered a Mini and a Little Guy, so hopefully, they will arrive soon, so I can use them in the photos and videos, too.)
The pouch can also be woven on any of the larger Mirrix looms as well- if you are using one of the smaller Mirrix looms, then warp up one pouch at a time. If you are using one of the larger looms, then you can warp and weave 2 pouches at the same time.
Even if you don't have a Mirrix loom, please feel welcome to join in the Weave Along.
As long as you have a loom that you can get good tight tension on it, then you will be able to weave the pouches.
copyright Noreen Crone-Findlay
You will also need: A steam iron, a pressing cloth, a good source of light, pencil crayons or watercolors or some other way of coloring your preliminary pattern colorways, 2 clothespins, scissors, needle and thread for finishing, snap fastener and a swivel clip, you'll also need paper for tracing out your patterns and trying out different color schemes.
copyright Noreen Crone-Findlay
Knitting needles and crochet hooks are very helpful, and  a loop turning tool is  handy (I bought mine at my local fabric store),  a piece of cardboard that is 10 inches tall by 3 inches wide (25 cm tall by 7.5 cm wide),  a weaving stick, small paper clamps, a fork or beater, a hole punch, at least a yard of firm yarn or cord, clear tape (packing tape works well); a black fine tip permanent marker
copyright Noreen Crone-Findlay
You'll need rods for the top and lower edge of the weaving: 6 inch (15 cm) tent pegs or 6 inch (15 cm) lengths of steel or brass rods 1/8 inch in diameter (I bought a 36 inch long one at the hardware store and cut it to 6 inch lengths with a hacksaw);  velcro straps (I bought mine from Lee Valley:  Link'S' HOOKS: 25  "S" hooks, either 7/8 inch or 1 inch- opened or closed :[ I had a huge 'AHA' when I bought closed 'S' hooks.... having one end closed is just GREAT... so if you buy closed 'S' hooks, open one end with pliers.  If you buy open 'S' hooks, squeeze one of the ends closed. Having the closed end keeps the 'S' hooks on the rod.  :) ] ; 1/4 inch Washers: 54 in total; 1 or 2 pairs of pliers for adjusting the 'S' hooks; ruler and tape measure.
copyright Noreen Crone-Findlay
Some of these things have shown up in other photos, so I won't list them again, but the other things are:  A small bowl for holding pins, needles, clamps etc;  a bag or box to store and transport the project (that's Tottie Tomato's knitting bag); chopsticks are very handy for several things  besides your Pad Thai :)
copyright Noreen Crone-Findlay
You will need at least 5 or 6 blunt tapestry or craft or darning needles. It's handy to have a needlebook or tin, or cardboard tube or eyeglass case to store them in.
copyright Noreen Crone-Findlay
To line the pouch: Fabric (I upcycled one of my son's abandoned t shirts for the lining of the first 4 bags), scissors, pins, needle and thread, snap fastener: I used the 15 mm size.
copyright Noreen Crone-Findlay
To make the edging cord: A kumihimo kit (the cd is a stand in as I haven't received mine yet) available from Mirrix: LINK
OR a spool knitter: Lion Brand: LINK
or Harrisville:  LINK

CHECKLIST at a glance:

- Loom

- steam iron
- pressing cloth
-a good source of light
- pencil crayons or watercolors or some other way of coloring your preliminary pattern colorways
- paper for tracing out your patterns and trying out different color schemes
- 2 clothespins
-scissors
-needle and thread for finishing
-snap fastener 15 mm size

-swivel snap hook (optional)
-knitting needles & crochet hooks
-Optional:  a loop turning tool is  handy
-a piece of cardboard that is 10 inches tall by 3 inches wide (25 cm tall by 7.5 cm wide)
-  a weaving stick
- small paper clamps
-a fork or beater
-a hole punch
-at least a yard of firm yarn or cord
-clear tape (packing tape works well)
-a black fine tip permanent marker
-Rods for the top and lower edge of the weaving: 6 inch (15 cm) tent pegs or 6 inch (15 cm) lengths of steel or brass rods 1/8 inch in diameter
-velcro straps   Link
-'S' HOOKS: 25  "S" hooks, either 7/8 inch or 1 inch- opened or closed 
1/4 inch Washers: 54 in total
-1 or 2 pairs of pliers for adjusting the 'S' hooks
-ruler and tape measure
- small bowl for holding pins, needles, clamps etc
- a bag or box to store and transport the project
- chopstick (optional)

- At least 5 or 6 blunt tapestry or craft or darning needles and a needlebook or tin, or cardboard tube or eyeglass case to store them in.
-Lining fabric
- Straight pins

-kumihimo kit  OR a spool knitter
-any other embellishments, beads, buttons, charms or found objects that you wish to use.
Happy Weaving!
:) Noreen

Friday, August 3, 2012

Mirrix Looms Weave Along #8 Soumak Pouch-ALL the links

Mirrix Loom Weave Along #8  Soumak Pouch- All the links

This blog post is going to be growing, as I will be listing all the links to each of the posts for the Weave Along Soumak Business Card Pouch.

copyright Noreen Crone-Findlay

Mirrix Loom Weave Along # 8 Soumak Pouch-1- Warp and Weft suggestions and links to order them: LINK

copyright Noreen Crone-Findlay
Mirrix Loom Weave Along Soumak Business Card or Cellphone pouch - 2 - Tools, equipment and materials: LINK
copyright Noreen Crone-Findlay
Information about the Kit from Mirrix, and the tools and materials for edgings: LINK
copyright Noreen Crone-Findlay
Two more pouches and links for Kreinik threads: LINK
copyright Noreen Crone-Findlay
Part One: Setting up the Looms: LINK
copyright Noreen Crone-Findlay
Part Two: Design Notes: LINK
copyright Noreen Crone-Findlay
Part Three: Warping the Looms: LINK

Part Four: Weaving techniques: LINK

Wednesday, July 25, 2012

Tips for quick and easy heddling on Mirrix looms

Tips for quick and easy heddling on Mirrix looms

I love how easy it is to warp the Mirrix looms.
I’ve found that there are a few things that can make the process of attaching the heddles go quick as a wink.
Efficient is good!  :)
copyright Noreen Crone-Findlay
The first thing that I do, after I release the warping bar from the blocks and turn them around, is to slide a piece of cardboard or masonite between the layers of warp strands at the front of the loom and the back of the loom.
It sits there, in the middle, blocking the distracting view of those warp strands at the back of the loom. :)
Then, I use a shed stick that is at least as long as the width of the loom to pick up every other warp strand.
copyright Noreen Crone-Findlay
Then, I flip the shed stick on it’s side, with each end being supported by the shedding device blocks.
I now have 2 layers of warp strands because of this shed being open.
So, to keep the back warp strands out of view, I slide a ruler or strip of cardboard into the open shed.
Bliss! Now, I just have one set of warp strands ready for the heddles- Yay!
This makes things sooooo much easier!
I like the center brass knob of the shed changer to be as close to the exact center of the warp strands.
So, I count how many strands I need to attach to the rod, and divide that in 1/2.
I place 1/2 the heddles on 2 of my fingers, and 1/2 on the other 2 fingers.
copyright Noreen Crone-Findlay
I loosen the heddle rod and slide it along so it’s about 2 inches/5 cm from the edge of the warp strands.
copyright Noreen Crone-Findlay
Then, I reach behind the warp strand with a crochet hook, pluck a heddle off my fingers, and pull it behind the warp strand.
I catch both ends of the heddle loop and pop them onto the heddle bar. Slide the bar along as you go.
When I run out of the the first clump of heddles, I should be half way along the warp strands.
I work across , picking up all the strands, and attaching them to the heddle bar, then tighten up the little nut that holds the heddle bar in place.
Remove the shed stick and ruler, then rotate the heddle bar, sliding the heddles down the warp strands.
Turn the shed opener enough so the heddles open your first shed.
copyright Noreen Crone-Findlay
Use the shed stick to pick up the warp strands that are between the warp strands that you have just heddled.
Turn it on it’s side, insert the ruler, and repeat the process.
Check to make sure that all the heddles are securely attached to the heddle rods.
When I was making the video, one little bounder escaped, which was actually a good thing.
This allowed me to show how to capture the escapee heddle and tie it back in place.

copyright Noreen Crone-Findlay
Remove the shed stick and ruler and check the sheds, then attach the handle or treadle and Voila!
You’re ready to weave!
Here’s the video:

Happy Weaving! :D

Sunday, July 22, 2012

Warping Mirrix Looms with Loom Extenders

Warping Mirrix Looms with Loom Extenders

Loom extenders for the Mirrix looms are sooooooo neat!
You’ll need to make a few adjustments when you are warping the extended loom.
Your best friends when warping the extended loom: Two chairs that don’t have upholstery or cushions:
copyright Noreen Crone-Findlay
Place  the chairs as far apart as possible:
copyright Noreen Crone-Findlay
This leaves a gap that allows you to easily pass the ball of warp around the loom.
You could use 2 small tables if you would prefer, but I like the height of the chairs.
The loom is still happily very stable when it’s extended.
Amazing, isn’t it?
That’s great design for you. :)
One of the other things that I have found while weaving on the extended loom is that the weaving can pull in on you.
So, to rectify this, take 2 rubber bands, and 2 paperclips.
Open the paperclips, fold the rubber bands around the side bars, and squeeze the shorter end of the paperclip closed.
copyright Noreen Crone-Findlay
Hook the larger end of the paperclip through the selvedge, about a half inch below the fell line.
Make sure that the end of the paperclip is towards the back of the loom, as this makes it be less of a snaggle hazard.
Here’s the video:

Happy weaving! :)
Noreen