If you have a loom that doesn't have a shedding device, picking up
the warp strands for every row you weave can be a tedious process.
I like to use a stick, a pin and a loop of string to open the sheds. It's a huge time saver!
I've made a video tutorial on how to do this for narrow bands, but this technique also works on wider pieces, too.
copyright Noreen Crone-Findlay
Pick up every other warp strand with a weaving stick (even a popsicle/craft stick or a paint stick will work).
Push that stick up to the top of the loom.
copyright Noreen Crone-Findlay
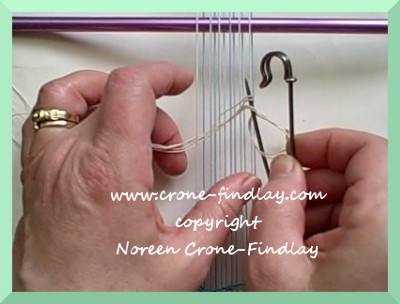
Now, use a knitting needle to pick up the ~remaining~ warp strands, to open the second shed.
You'll be going over the strands that you went under in the first shed, and under the 'overs'.
copyright Noreen Crone-Findlay
Take
a loop of string (in this case, I used 2 string heddles from one of my
inkle looms held together for more strength, and to make it easier to
see in the video) through the open shed.
copyright Noreen Crone-Findlay
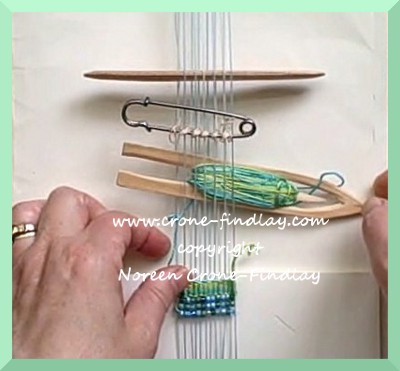
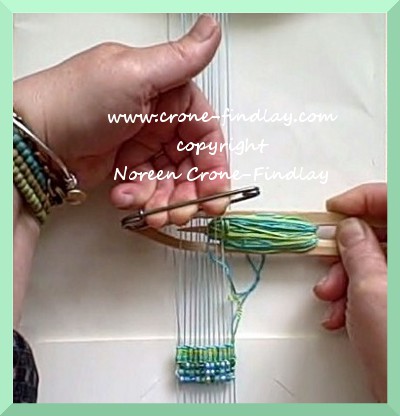
Pick up the end of the loop with a kilt pin, and then lift the loop strings between each warp strand onto the pin.
copyright Noreen Crone-Findlay
Take the second end of the loop up onto the pin, and close it.
Adjust the length of each section of the loop.
And, Voila! you now have a handy, dandy way of opening both sheds!
copyright Noreen Crone-Findlay
copyright Noreen Crone-Findlay
Here's a pic of the shuttles that I make by upcycling old rulers and bits of decorative trim:
copyright Noreen Crone-Findlay
HOT TIPthat
I mentioned in the video: If you use a file folder as the
separator/background thingie between the front and back of your loom,
you can use the pocket of the file folder to park your shuttle and
beading needle when you're not weaving.
And, here's the video tutorial:
I love buying vintage crochet cotton at the thrift shop. It speaks to
me of the hands that it has passed through, and the pleasure it has
brought to other thread lovers.
I like to use it in my weaving, crochet and tatting, as it gives me a sense of connection to needlewomen of the past.
BUT... storing balls of crochet cotton can be a problem. Those hollow cores take up a LOT of space!
So, for many years, I have been upcycling old credit cards or pieces of cardstock to make bobbins like this:
copyright Noreen Crone-Findlay
Because, storing yarn or thread on a small flat bobbin is so much more efficient than leaving it on the cardboard tubes:
copyright Noreen Crone-Findlay
Last
night, I had insomnia, and was thinking about winding off a pile of
vintage crochet cotton, when I had a flash of inspiration!!
Instead
of making chubby little embroidery style bobbins, if I made 'dog bone'
shape bobbins, I could use my bobbin winder to speed up the process of
winding them. AND, they'd take up less room, as it would be a longer,
leaner shape.
I jumped out of bed, and started cutting the new shape bobbins:
copyright Noreen Crone-Findlay
And, winding up balls of cotton:
copyright Noreen Crone-Findlay
In
a twinkling of an eye, I have compactly wound bobbins that won't tangle
with other bobbins, as the thread is taken through a slot and secured.
Another bonus! No snaggles!
copyright Noreen Crone-Findlay
This shape of bobbin is great for warping the Mirrix loom, as it's so compact.
Yep - it's a win!
And, they can be easily stored in unusual containers, like this:
copyright Noreen Crone-Findlay
I made a video to show how quickly and easily this works:
I haven't tried using these bobbins for tapestry weaving, but I will, and will let you know how I like them.
I love making tapestry bobbins from wood- especially upcycled wood, so I will be showing you how I do that in an upcoming post.
Happy weaving, and here's to creative ways of storing yarn and thread stash! :D
~Noreen ~