Saturday, June 30, 2012

How to weave inkle bands on Mirrix Looms Part Four

This is the fourth video tutorial about how to weave inkle bands on Mirrix looms.
copyright Noreen Crone-Findlay
A dear friend asked me: "Why are you spending all this time figuring out how to weave inkle bands on the Mirrix loom? You have inkle looms! "
Yes, I do... an open sided one, a closed side one that my husband built me from upcycled pallet wood, and a mini.
And, I love them.... but, I find that the open side and mini inkle looms both kind of flop when I have one end on the desk edge and one end in my lap. This is the way that I like to weave with inkle looms, and I find the wobble/flop rather frustrating.
I really like how stable the Mirrix is when I have the lower edge in my lap and the upper edge against a workbench, table or desk.
Also, I love the precision of the tensioning on the Mirrix... those thumbscrews are sweet!
And, I also love the shedding device.......... soooooooooo smooth.  :D
Besides, the Mirrix takes up sooooooooooooo little room to store it- inkle looms do take up a chunk of space in the studio!
That's four good reasons that have made this rather challenging learning curve worthy of the time I have invested.
Here's the video for the finishing process of weaving inkle bands on the Mirrix loom:

When you have woven your bands to the point that the warping rod is sitting on top of the loom, you will need to remove the spring:
copyright Noreen Crone-Findlay
Loosen the tension up  a lot....
copyright Noreen Crone-Findlay
Lift the spring rod out of the spring.
Release the ends of the springs from the knobs.
Gently, ease the spring out of the warp strands by spreading the warp strands out slightly and pushing on the spring to disengage it.
Continue weaving until the shuttle almost can't make it through the shed.
copyright Noreen Crone-Findlay
Weave one row.
Keep the shuttle in the shed, and place a darning or tapestry needle in the shed with the point pointing in the direction that the shuttle exits the shed.
Weave the next row, and repeat with a second darning needle.
The needles now point in opposite directions.
Weave one more row.
Cut the weft strand, and thread it into the first needle.
Pull it through, and remove the needle.
Thread the weft strand into the remaining needle and pull it through.
La de dah! you have finished your inkle band!
Wheee! :D
I always weave the tail end in a little bit more before I trim it off.
Loosen the tension wayyyyyyyyyyyyyyyyyy off, and slide the warping rod out of the loops.
Trim the ends, and pull them through the heddles.
Congratulations, you've woven some scrumptious new inkle bands! :)
Happy Weaving!
~Noreen

How to weave inkle bands Part Three

Part 3 of the video tutorial series on how to weave inkle bands on Mirrix looms is about the weaving process:
copyright Noreen Crone-Findlay
Something that I learned as I trundled up my ever so steep learning curve with figuring out how to weave inkle bands on the Mirrix loom:
I started out by weaving one row on one band, putting it's shuttle down, then picking up the second shuttle and weaving one row on the other band.
Sounds slow and clunky, doesn't it? Well, you're right.
The most efficient way to weave 2 bands at once is to weave as far as you can on one band, then set that shuttle aside, and weave away on the second band.
Oh... speaking of shuttles, here's the tracing of my most favorite inkle shuttle:
copyright Noreen Crone-Findlay
I designed this one several years ago, and I love it. Works like a charm.
Here's the video that shows the weaving process:

copyright Noreen Crone-Findlay
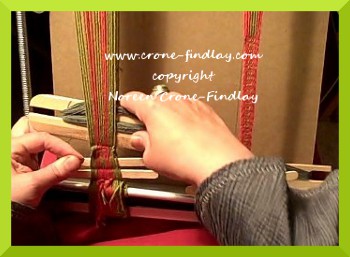
When you need to advance the warp, loosen the tension quite a lot.
Support the spring as you gently ooze the warp rod around and up the back of the loom.
Pat the warp strands back into the channel, and tighten up the tension again.
Remember, you do not need to have the tension as tight as when you are weaving a tapestry or beading.
You'll find the perfect tension that suits you best.
Keep on weaving until the warp rod is sitting on top of the loom, and then check into the 4 th video in the series:
How to finish the bands.
~Noreen

How to weave inkle bands on Mirrix looms Part Two

This is the second stage of the video tutorials that I made on how to weave inkle bands on the Mirrix loom.
copyright Noreen Crone-Findlay
There are two bands on the loom, because in this video, I am working on the 16 inch loom.
When you work on the 8 inch loom, it's okay to just weave one band at a time, as the warping bar doesn't flop around.
But, on the 16 inch loom, you do need to either warp up 2 bands, or secure the other end of the warping bar with a cord so it will stay perfectly horizontal.
I tried weaving 3 bands at once on the 16 inch loom, and didn't like it, as the center knobs on the shedding device got in the way.
Two bands are just great though.
AND.... if you want to weave longer bands, and have either a 12 inch or 16 inch Mirrix loom then the loom extenders will be your friend :)
I use a crochet hook and a weaving stick to make the heddling process go quick like a bunny.
Here's the video tutorial:

Start by placing a piece of cardboard between the layers at the front of the loom and the back so you can't see the warp strands at the back of the loom.
copyright Noreen Crone-Findlay
Place the shed changing device into the brackets.  Unscrew the little knob that holds the heddle rod in place.
Pull the heddle rod back so it's about half way along the warp strands.
copyright Noreen Crone-Findlay
Place the heddles onto the fingers of your non dominant hand.
copyright Noreen Crone-Findlay
Look down at the warp strands that are at the lower edge of the front of the loom.
There's a gap between the strands that have gone in front of the warping bar and behind it.
Slip your fingers into the gap and scoot them up to the shedding device.
Slide a shed stick into the gap.
Voila! (which is how 'walla' is really spelled :)  )
You have shed one ready to heddle!
copyright Noreen Crone-Findlay
Now, slip the crochet hook behind the first warp strand, pluck a heddle off your fingers, and pull it forward.
Catch the other end of the heddle loop and place both loops on the heddle rod.
Go slowly, and be sure that both ends of the heddle loop stay politely on the heddle rod.
copyright Noreen Crone-Findlay
When you have all of the warp strands heddled, slide the heddle bar into position in the knobs, and tighten the lock nut.
Repeat the heddling process on the second set of warp strands for your other band.
copyright Noreen Crone-Findlay
Push the first set of heddles down as you rotate the shedding device.
copyright Noreen Crone-Findlay
Leave the shed stick in place, and use the crochet hook to pick up the warp strands for the other shed.
Take the warp strand from the back to the right of the one in front, and onto the hook,
take the hook over the front strand, and pick up the next strand and carry on across.
copyright Noreen Crone-Findlay
Slide the weaving stick out of the first shed, and slip it along the crochet hook to transfer the warp strands from the crochet hook to the weaving stick.
copyright Noreen Crone-Findlay
Turn the weaving stick on it's side, and then pick up the warp strands one at a time and capture them with the heddles just as you did for the first set of warp strands.
copyright Noreen Crone-Findlay
Repeat this process for the second band.
Check your heddles carefully to make sure that they are opening the sheds properly.
Ahhhhh! a warped loom is a thing of beauty!
copyright Noreen Crone-Findlay
Attach the handle to the shedding device and adjust the tension by turning the thumbscrews.
Open the first shed, and insert a craft stick, then open the second shed and insert another craft stick.
Squish the warp strands together to establish the width of your band.
copyright Noreen Crone-Findlay
Weave one row, leaving a 6 inch/15 cm tail.
Change sheds, and weave the next row.
Pull up firmly on the tail end and weave it through the same shed.
Repeat several times until the tail end is woven in, and the band is established.
Next video: The fun part! Wheeeeeee.... weaving...... 
~Noreen
How to weave inkle bands on Mirrix looms Part One

I love weaving inkle (warp face) bands.
I use  in dollmaking:
copyright Noreen Crone-Findlay
Link to purchase pattern for Inkle dolls: Inkle Dolls
And, they are wonderful for trimming handwoven clothing:
copyright Noreen Crone-Findlay
Link to post that shows how to shape inkle bands to make a yoke or other shaped pieces of garments: Warp pulling
Over the years,  I have also made hat bands, book marks, all kinds of jewelry, key fobs,  vests, bags, bag handles, the garters for the men's kilt hose for my son's wedding, shawls, freeform pieces that combine inkle weaving, knitting, embroidery, spool knitting and crochet, as well as rugs.
Yep. I love inkle weaving.
So, as I have been exploring the possibilities of weaving with my Mirrix looms, I had to give inkle weaving a try.
I found that it was quite challenging at first. But, I don't give up easily :)
I ended up spending waaaaaaaaaaaaaaay more hours than I should have, experimenting and obsessing over making inkle bands on the Mirrix.
Well... I finally succeeded.
Since it was so challenging, I figured that I should share what I have learned, so that other intrepid inkle weavers can leap right in, without all the trial,  error and frogging that I went through!
There are definitely tricks to weaving inkle bands on the Mirrix looms, and I have made 4 videos to share those tricks.
Here's part one of the video:

Here is the draft for the bands that I wove in the videos:
copyright Noreen Crone-Findlay
To read the draft: Each square represents one warp strand.
You can check your warping by looking at each shed to see that it has the same number of strands, in the order that they appear in the line.
You will be  putting a total of 8 green strands on, followed by 4 orange strands, 3 sets of  (1 orange, 1 green) for a total of 6 strands, then 4 orange strands and ending with 8 green strands.
At the top and bottom of the loom, you'll see the full count of warp strands.
At the warping bar, the 2 sheds will be separated into their correct (we hope!) configuration for each shed.
The chart will give you bands like this:
copyright Noreen Crone-Findlay
The upper band is the band on the right hand side of the loom in videos 2 - 4.
I only used the center of the draft for it, without the green border strands.
The yarn is Lion Brand Cotton.
copyright Noreen Crone-Findlay
Setting up the loom for inkle bands is different than normal warping.
You need to have the warping bar at the front of the loom.
copyright Noreen Crone-Findlay
Tie the green yarn onto the warping bar and take it up and around the loom, just the same as if the warping bar was in the back.
copyright Noreen Crone-Findlay
You will need to cut the warp strand of color 1 to tie on color 2 at the warping bar, for EVERY color change.
WHAT?!?!?!
Yes. really.
It sounds insane, but this is the biggest key to making the whole inkle thing work on the Mirrix loom.
Trust me. You ~can~ twist your yarns around each other, and are welcome to, I'm sure, if that would make you happy....
BUT.... the quickest, easiest way to have problem free warping for inkle is to cut those little darlin's and tie the knots between the colors.
copyright Noreen Crone-Findlay
Yay! Warped!  Insert the spring rod into the spring to keep the warp strands locked into their notches.
This is sooooooooooo important!  (yep... voice of 'oops' experience here :( )
And in Part 2.... it's on to the heddles.
I have a nifty, super friendly way of using a crochet hook and weaving stick to make the heddling process go like a breeze.
That's coming up next.... so stay tuned! :)
Happy Weaving,
Noreen

Friday, June 29, 2012

Two needle method for beading on the loom

As you probably know, the usual method of bead looming is to tie a length of weft to the edge warp then load your beads, and pass through them from the top. That's how I started, and the only way I knew. Until someone introduced me to the two needle method. 

In this branch, there are two methods. In one, the needles move in opposite directions. In the other, they move in the same direction. Since discovering these, I use then (mainly the former) 99.999% of the time. That obviously tells you I prefer them! I can work with a longer length of thread, skip beads less often (not that I did much previously), and seem to add new thread less often. 

The latter method, where the needles move in the same direction, is very useful when you're working an area of the same colour. You just load one half of the weft with beads and go on your merry way. This advantage is best seen with wider pieces. I used it in one of my previous portraits for the background. I got tired of counting, and loading using the bead spinner then having to remove some!

So on that note, here is my second video. I try and explain the first of the two methods, including a few close up pictures. I hope it's clear enough and gets your interest. I don't think these methods are talked about much, at least not as far as I've seen.


If you have questions, contact me through the blog. 

I mentioned the bead spinner above. I had the lightbulb moment (I'm sure I'm not the first) when I was working on that background. Imagine counting out 150+ beads of one colour, a shiny white. Yes, you can see the concentration wondering! So, if you have a bead spinner and are working in one colour, think about dustin off those cobwebs :)

Lastly, I found a way to work on the Mirrix in a horizontal position. Just pull out the legs and place the clips behind the loom. Bobs your uncle! I'll edit this tomorrow and post the photo. 

In the meantime, stay well and happy reading.

Monday, June 25, 2012

Getting to the good part!

The plan for yesterday included looming in the afternoon or evening. By the time I was done with shopping, cooking, washing and getting a packed lunch ready, it was too late to get in a decent amount. I was also tired - more probe to mistakes and redoing rows several times over!

With the purse on the loom (Mirrix), I'm working with 37 colours. The setup looks like below. It takes about 3-4 minutes to get all the colours laid out in order (lowest to highest DB number), and put away when I'm finished. I have been using this setup for a while, and it works for me. 5 colours in each row numbered from 1 to 9 then A and up. I've used it enough to memorise which letter or number is at the start of each row. I don't need to count very often I'm so used to it.

When I first worked with two mats worth of colours, I stuck a piece of paper to the wall in front. It just had the start number/letter for each row, serving as a reminder. The getting out/putting away can be tiresome, so I need to think of a way to store them so they're ready to be used without too much faffing around! I'll have to think about that a bit more.

setup

I have done two things with this. The first, and new, is to loom from the bottom up. I didn't reverse the rows in the word chart so I'm reading from the bottom up! I haven't confused any rows yet so that's good. But I think I prefer to work top down. I guess that's what I'm used to. The second is I worked those first rows with a single needle (usual method of looming). I normally use the two-needle method regardless of whether I'm working on a bracelet or wider piece. The needles travel in opposite directions.

There is another where the needless travel in the same direction. That is very useful for areas of solid colour. You can load beads onto one half of the weft, and use the other end to pass through to secure them. The advantage is being able to use a longer length of thread without fear of it becoming tangled. I also seem to add thread less often. it's better seen so I'll try and show it in my next YouTube video.

On that note, here is the progress. That's a hand appearing on the left! The excitement starts now! There's one colour I need more of, so don't know how much I'll be able to loom tomorrow. I'm getting more on Wednesday so can continue soon.


Till next time, happy beading :)

Friday, June 22, 2012

How to weave Leno Lace on the Mirrix loom

I am fascinated by exploring all  the different things that I can do with Mirrix looms.
While I am involved in this four month long co-creation with Mirrix looms, I am going to be  looking at what I can and can't do with the Mirrix looms.
  (Guess what I am NO GOOD at? Bead weaving on the Mirrix!
Yep. All my bead weaving has been off loom and I am TERRIBLE at bead weaving on the loom. 
That one came as a surprise...  ah well... we shall see if that changes! )
In my previous blog post, LINK, I showed how I set up my Lani Mirrix loom, using the 'No Warp Ends' warping technique. 

copyright Noreen Crone-Findlay
There are several advantages in setting up your Mirrix loom for the 'No Warp Ends' technique:
It allows you to sample different weaving techniques quickly and efficiently.
You won't waste time OR yarn when using the 'No Warp Ends' technique.
I love that!
Because the 'No Warp Ends' warping technique precludes using a shedding device, it is perfect for weaving techniques that are hand manipulated, like: LENO lace! Yay!
I think that Leno lace is the bee's knees. 
It's kind of a miniature version of the ancient technique of twisting fibers, called, Sprang.

You do this nifty twist thing, and tadah! You get a  bonus free row that is cheerfully waiting for you, gratis! Whee!
copyright Noreen Crone-Findlay
Leno can seem a little challenging at first, so I figured that a video  tutorial is a good idea.
Here it is:

Happy Weaving!
:)

A slightly different approach to the 'No Warp Ends' technique

I hate wasting yarn... so I really don't like loom waste - who wants to toss their yarn in the trash? Really :)
That's why I love Claudia Chase's 'No Warp Ends' technique for the Mirrix  looms.
copyright Noreen Crone-Findlay
The one thing that I wasn't keen on was using paper clips to be the holders for the yarn ends, so I thought about it and mulled it over.
Hmmmm....  I use 'S' hooks all the time to hang things and connect them, but I have never used them on a loom.
This called for some experimenting.
I don't know about you.... but, I have a tendency to start with a really complicated plan, and have to do a lot of trial and errors to get to the elegant and simple final version.
I was thinking about all kinds of ways of making harnesses to hold the bars for the 's' hooks.... oh my!
I also figured that I wanted to use both sides of the loom while setting up for this technique.
I had woven two affinity bracelets at the same time- one on the front of the loom, and one on the back, so this seemed to stick in my mind as 'the way to go'.
Well... I twiddled and fiddled, and threw away the whole overly elaborate harness idea, and ended up using 4 loops of double sided velcro to hold the bars to the upper and lower edges of the loom.
That was a  big breakthrough- talk about a simple way to do this! Yay!~
And, I am really pleased with the final method that I came up with- it really works for me!
copyright Noreen Crone-Findlay
Here is the video, showing how I warp the Mirrix Lani using the 'No Warp Ends' technique, with 'S' hooks:
Happy Weaving!
Noreen

Thursday, June 21, 2012

Saved warp thread

I my last blog post, I talked about two projects that I rally want to loom, and how I couldn't choose which to do first. Someone then suggested I could get them both on the loom. There are two options for this. Firstly, I could loom one, then advance the completed weaving and then loom the other. secondly, I could warp as usual and push the warping bar all the way down. Then I would be free to use both sides of the loom simultaneously. The latter sounded more like what would be the suitable method.

Now, the two projects are 152 and 162 beads wide. I don't want to jump in at the deep end, as it's crucial for me to get them absolutely right. With that in mind, I decided to try out this way of using the loom before proceeding with the portrait and purse. I warped as usual, then pushed the warping bar as far down as I could. It doesn't quite fit underneath the loom so it juts out slightly at an angle.

I encountered no problems in warping and moving the warping bar. I then loomed two rows at top and bottom of the warps for the (two) projects that would go on the back. There was no need to do this for the front project, as the coil was enough to space the warps. I did add a line of beads on the front of the bottom bar, but found I couldn't quite place the warps in it once I had moved the warping bar downwards. However, this can be very effective in spacing the warps towards the bottom of the loom, if you don't have the bottom spring kit. Thank you to the person who suggested it to me (you know who you are).

multiple - spacing

As you can see I am able to work on three projects at the same time. Without the extra warping bar kit, a substantial amount of warping thread is used for warping. This is one way to reduce this warp wastage, as long as the warp colour chosen matches what you plan to loom. So, a little forward planning helps. As I often like to (or inevitably) work on several projects, this makes things easier for me - I don't have to keep swapping looms to work on each, and my thread doesn't go to waste.

Multiple - purse

multiple - bracelets

So, I think this could be something I use again in the future if I have multiple projects that can fit on the Mirrix at the same time. For now, I have the two bracelets at the back, and the front of a photo purse to complete. Some warp cutting is necessary for the bracelet on the left, but I may leave that till the front project is all loomed. I'll make up my mind as I go along.

I'm off to nurse my cold and get some sleep. Hopefully I can do some more tomorrow evening. The purse (front) takes some time to set everything up - more than 26 colours need to be laid out on bead mats, in a particular order. It's a little boring but needs must! Sweet beady dreams!

Thursday, June 14, 2012

How to wind butterflies and make upcycled wooden tapestry bobbins

Some people love weaving with yarn butterflies.
And some people (like me) don't. 
I love wooden tapestry bobbins and I love making each one a unique piece- and I especially like using upcycled wood to make them.
So, for those of you who like yarn butterflies, here's a video tutorial on how to make yarn butterflies:


And, here's how I make my one of a kind tapestry bobbins, which wouldn't suit everyone, but I love them and find them to be a pleasure to use:
Start with a piece of cast off wood. In this case, a wooden plaque (don't use chipboard or mdf ! This needs to be hardwood)
a thrown away plaque from a garage sale
Flip it over, and draw in the rough lines for the first cuts:
copyright Noreen Crone-Findlay
next, saw them into rough shape:
copyright Noreen Crone-Findlay
Working on getting more definition and shaping:

copyright Noreen Crone-Findlay
All the wooden offcuts are going to be burned in the wood burning stove in the studio in the winter- nothing's wasted!
copyright Noreen Crone-Findlay
When the rough saw shaping is done:
copyright Noreen Crone-Findlay
I move over to the belt sander:
copyright Noreen Crone-Findlay
and I do a whole bunch of sanding (very carefully)
copyright Noreen Crone-Findlay
Did I mention that this is a really slow, meditative process? Yup.
Go slowly... and pay attention....
Then, it's off to work with a bunch of different small sanding drums:
copyright Noreen Crone-Findlay
and files:
copyright Noreen Crone-Findlay
And more sanding:
copyright Noreen Crone-Findlay
and then, I draw faces on each one, and get out my wood burning tool and draw and burn faces and the year on each one:
copyright Noreen Crone-Findlay
Here's a closer look:
copyright Noreen Crone-Findlay
I just listen to what each bobbin wants, and then I draw on their faces. Some of them crack me up.
copyright Noreen Crone-Findlay
Like the 'Get to the Point' guy... 3rd from the left....  I know, I am easily amused....
And, here they are, all wrapped up and ready to weave!
copyright Noreen Crone-Findlay
I hope that the photos will all open for you!
So, happy butterflies, and happy bobbin-ing!
Happy weaving! :)